¿Como se cura la Balanitis? síntomas, causas, curas, remedios naturales

El término balanita deriva del griego, de la unión de dos palabras que significan respectivamente:

  • balanos , bellota
  • itis , inflamación

e indica una infección o inflamación de la piel de la parte superior del pene (glande) que ocurre por la aparición de uno o más de los siguientes síntomas:

  • enrojecimiento en el glande y dentro del prepucio,
  • pérdidas,
  • mal olor
  • picazón (raramente).

La balanitis puede afectar tanto a los hombres circuncidados como a los no circuncidados , con una mayor frecuencia en estos últimos debido a una higiene íntima más difícil, esencial para eliminar el esmegma que puede acumularse debajo del prepucio favoreciendo la aparición de infecciones molestas.

Finalmente, hablamos de balanopostitis cuando la inflamación también afecta el interior de la piel del prepucio (el prepucio es la envoltura cutánea del glande, que se elimina en los sujetos circuncidados).

Como se cura la Balanitis, Tratamiento.

Para el tratamiento de la balanitis , y dar alivio a glande enrojecidos, sólo tienes que seguir unos pequeños consejos:
  • Deje de usar todos los jabones : evite las lociones y polvos perfumados, ya que a menudo son las causas de la irritación del prepucio. Use solo agua caliente para lavar.
  • Cremas antiinflamatorias : después del diagnóstico, su médico probablemente le recetará una crema para la picazón para ayudar a detener la inflamación. La balanitis también podría ser causada por un hongo. En este caso, puede usar una crema antimicótica que contenga nistatina, clotrimazol o terbinafina. También podría recetar cremas con esteroides para reducir la inflamación, especialmente los esteoruros tópicos que contienen hidrocortisona .
  • Antibióticos y antifúngicos : si existe una infección, el médico puede recetar un antibiótico o un medicamento antimicótico para ayudar a eliminarlo. Esto podría ser suficiente para contrarrestar la inflamación, hinchazón, picazón y pérdida.
  • Terapias sin receta : puede intentar tratar la balanitis por su cuenta con una mezcla de vinagre diluido y la solución de Burow, aplicada localmente con una gasa. Esta mezcla actúa como astringente haciendo que la piel se contraiga, lo que ayuda a aliviar la irritación.


Remedios caseros naturales para la balanitis

Para tratar la balanitis con remedios naturales, tome las siguientes precauciones:
  • Ajo : es un excelente remedio casero para una amplia variedad de afecciones, incluida la balanitis. El ajo está indicado para esta patología gracias a la presencia de alicina que tiene excelentes propiedades antimicrobianas y antiinflamatorias. Estas propiedades son excelentes contra las bacterias que pueden causar balanitis: para beneficiarse simplemente agregue más ajo a la dieta. Alternativamente, puede hacer una pasta de ajo machacando algunos dientes y agregando un poco de agua hasta que la masa esté suave. Aplique la pasta en la punta del pene y las áreas de los genitales que están inflamadas y tienen picazón. El procedimiento puede repetirse varias veces al día hasta que la afección se haya curado.
  • Aceite esencial de árbol de té : muchos aceites esenciales poseen las propiedades naturales que pueden aliviar los síntomas de la balanitis y tratar la causa, ya sean bacterias u hongos. El aceite esencial de árbol de té es particularmente efectivo cuando se trata el tratamiento de la balanitis porque contiene compuestos antimicrobianos extremadamente fuertes, además de ser un excelente antiinflamatorio que puede calmar la inflamación y la irritación. Diluya unas gotas de aceite esencial de árbol de té en una cucharadita de aceite de coco virgen y aplique la mezcla en el área afectada varias veces al día.
  • Pimienta de cayena : tiene numerosas propiedades saludables. Estos pimientos contienen un compuesto llamado capsaicina que puede ayudar a aliviar el dolor y reducir la irritación causada por la balanitis. También es una rica fuente de vitaminas y antioxidantes con excelentes efectos antiinflamatorios. Agregue algunos de estos pimientos picantes a la dieta. También puede encontrar cremas que contienen capsaicina, para aplicar localmente.
  • Caléndula : tiene excelentes propiedades antiinflamatorias que pueden ayudar a aliviar el dolor y la inflamación causados ​​por la balanitis. Puede usar caléndula seca o fresca para preparar un té antiinflamatorio o comprar cremas y ungüentos a base de caléndula. La aplicación de esta crema en el prepucio y otras áreas irritadas de los genitales puede ayudar a calmar el dolor y la inflamación asociados con la afección.
  • Aloe vera : lleno del tipo correcto de propiedades y efectos medicinales que son perfectos para tratar la piel inflamada e irritada. Tiene una variedad de usos para la piel que incluye alivio del dolor y la hinchazón causada por la balanitis. Tome una hoja fresca de aloe vera y córtela a lo largo. Extraiga el gel de la hoja y aplíquelo en el área afectada del pene. Repita el procedimiento dos veces al día. Si no puede obtener hojas frescas de aloe, los geles listos para usar están disponibles y pueden ser igual de efectivos.
  • Jengibre : tiene acciones antibacterianas y antiinflamatorias excepcionales que pueden ayudar a curar cualquier infección que pueda causar la afección y también a desaparecer los síntomas. Agrega jengibre a tu dieta. También puedes preparar un té antiinflamatorio con raíz de jengibre. Simplemente revise algunas rodajas de raíz fresca en agua hirviendo durante unos diez minutos y beba varias veces al día. Combina con la cúrcuma para un efecto aún mayor.
  • Aceite de coco : otro excelente remedio tópico para tratar la irritación y la hinchazón causadas por la balanitis. Contiene numerosos compuestos medicinales que incluyen ácido láurico y ácido caprílico que tienen excelentes efectos antimicrobianos y acciones antiinflamatorias. El aceite de coco puede ayudar a tratar la infección bacteriana o fúngica que causó la afección y también alivia la irritación y otros síntomas. Simplemente aplique aceite de coco virgen de buena calidad en el área afectada del pene 2/3 veces al día.
  • Vinagre de manzana : tiene excelentes propiedades antimicrobianas y antiinflamatorias, perfecto para tratar afecciones de la piel como la balanitis. No aplique vinagre sobre la piel, ya que puede causar irritación. Dilúyalo primero con una cantidad igual de agua y luego aplíquelo cuidadosamente en el área afectada.
  • Yogur natural : es otro excelente remedio para la balanitis. Aplícalo localmente en las áreas afectadas del pene un par de veces al día o mézclalo con ajo para un efecto medicinal aún mayor.


Prevenir balanitis

Prevenir la balanitis es fácil, practicando una higiene adecuada : báñese todos los días, especialmente después de haber sudado o después de tener relaciones sexuales.
También es posible prevenir la aparición de balanitis:
  • evitando el uso de productos perfumados y desodorantes en el pene;
  • Secar completamente el pene después de una ducha.
Los síntomas de la balanitis pueden durar solo unos días, si la trata a tiempo tan pronto como la reconozca. Los largos períodos de balanitis pueden ser motivo de preocupación. Incluso estos casos más crónicos se pueden reducir con medicamentos recetados, pero un diagnóstico correcto es importante para prevenir la inflamación crónica.

Balanitis por Candida

Las infecciones por Candida son causadas por la presencia de Candida Albicans  y la balanitis / balanopostitis obviamente no es una excepción; Es un microorganismo presente en todas las personas sanas que, cuando toma ventaja y logra proliferar sin control, puede causar infecciones molestas. En los humanos, ocurren a nivel genital como erupciones que a menudo son dolorosas y están cubiertas con una ligera secreción blanquecina.

Muy común, especialmente en diabéticos , si no se tratan pueden convertirse en una causa de complicaciones como la fimosis.

A diferencia de lo que se piensa, la transmisión sexual es solo una de las posibles causas de contagio, y ni siquiera la más frecuente.

causas

La balanitis es causada por inflamación o infección que ocurre a nivel del glande, a menudo debido a una higiene íntima imperfecta, o porque no se puede descubrir deslizando el prepucio hacia la base del eje del pene (debido a la fimosis, un eventualidad muy común en niños y hasta la adolescencia).

Cuando el pene no se lava adecuadamente, incluso debajo del prepucio, se puede acumular esmegma, una sustancia blanquecina con mal olor que irrita la membrana mucosa del pene, favoreciendo la aparición de inflamación.

Otras causas posibles incluyen:

  • infecciones fúngicas ( candida ) o bacterias que viven en la piel (pueden ocurrir, por ejemplo, en el caso de diabetes, antibióticos o simplemente en el caso de una mala higiene),
  • infecciones de transmisión sexual , como herpes genital , gonorrea y sífilis ,
  • irritación de la piel causada por detergentes agresivos (dermatitis de contacto),
  • enfermedades benignas de la piel, como psoriasis , eccema atópico , liquen,
  • Algunos tipos de cáncer de piel (muy raro).

En niños pequeños, puede ocurrir eventualmente debido a la manipulación excesiva del prepucio.

Factores de riesgo

En teoría, todos los hombres pueden enfermarse, pero el trastorno se manifiesta con mayor frecuencia en aquellos con un prepucio estrecho, difícil de retirar y entre aquellos que no prestan suficiente atención a la higiene íntima.

La diabetes puede aumentar el riesgo, especialmente si usted no puede controlar su azúcar en la sangre , lo que si es demasiado alto debido a un aumento de azúcar en la orina, que a su vez entre en contacto con el glande y el prepucio es fomentar la proliferación de levaduras y bacterias.

Si el trastorno es recurrente, puede ser causado por una infección de levadura (candida) transmitida y retransmitida entre las parejas durante el coito (efecto ping-pong).

Los hombres circuncidados están menos sujetos al desarrollo de balanitis, porque tienen una condición más simple de manejar higiénicamente y la ausencia de prepucio no permite el estancamiento de pequeñas gotas de orina al final de la micción.

Los síntomas

Los síntomas típicos de la balanitis incluyen:

  • erupción rojiza e inflamada en el pene o debajo del prepucio,
  • hinchazón,
  • picazón o ardor en el área afectada,
  • dolor y ardor al orinar ,
  • fugas blanquecinas, grumosas o amarillentas de la piel afectada o del prepucio.

peligros

Una balanitis desatendida, o episodios recurrentes, puede favorecer la aparición de fimosis , un trastorno que causa el estrechamiento del prepucio evitando su deslizamiento normal sobre el glande; en los casos más severos es una condición que requiere poca cirugía para ser resuelta.

duración

La mayoría de los casos de balanitis reaccionan a la terapia dentro de 3-5 días (que, sin embargo, deben continuarse durante todo el tiempo indicado por el médico).

Cuando consultar a un médico

La balanitis no es un problema grave, pero es importante no descuidarla, y se recomienda que busque tratamiento inmediato en caso de síntomas dudosos.

Es importante verificar, por ejemplo, la posible presencia simultánea de infecciones de transmisión sexual y / o candida , así como excluir posibles (más raras) causas más graves.

En particular, es necesario indicar si:

  • la cura no muestra mejoría después de unos días,
  • Hay recurrencias frecuentes.

En el caso de la diabetes, la aparición de numerosos episodios a corta distancia puede indicar un control de glucosa en sangre no óptimo.

diagnóstico

Por lo general, el médico puede reconocer la balanitis con un simple examen visual, pero en algunos casos puede ser necesario tomar un hisopo o una muestra de piel para examinarla con el microscopio o enviarla al laboratorio para más pruebas para confirmar el diagnóstico.

Igualmente útil es la reconstrucción de la anamnesis del paciente, para tener en cuenta cualquier examen adicional (por ejemplo, en busca de enfermedades de transmisión sexual) o para proporcionar indicaciones sobre los métodos de higiene adecuados y los productos que se utilizarán.

Si la balanitis no responde a la terapia, o tiene características diferentes a las de una infección típica, el médico puede recomendarle que visite a un dermatólogo (especialista en enfermedades de la piel).

Cuidados y terapia

El tipo de terapia depende de la causa del trastorno, pero no puede prescindir de la práctica y regular de una correcta higiene íntima, que incluye el lavado diario del pene, descubierto por el prepucio, con agua tibia y posiblemente detergentes específicos (o delicados).

En niños más pequeños se recomienda:

  • no tire hacia atrás el prepucio para limpiarlo si aún no fluye,
  • cambie el pañal con frecuencia si todavía está en uso,
  • No use toallitas húmedas para la higiene del pene.

Puede ser útil recurrir a lubricantes durante las relaciones sexuales (y también en el caso de la masturbación, que siempre debe hacerse con las manos recién lavadas).

El médico a menudo prescribe una crema de cortisona ligera para tratar la inflamación típica de la balanitis, que se aplica generalmente por períodos cortos, lo que permite una curación rápida de los casos no infecciosos y permite un alivio inmediato de la picazón.

En caso de infecciones, es posible recetar medicamentos específicos:

  • Si el problema es causado por una infección micótica, se recetará una crema antimicótica, por ejemplo, a base de clotrimazol o similar.
  • Si la infección es de origen bacteriano, se le recetará una crema antibiótica.

Se recomienda precaución al usar un condón, ya que algunas cremas pueden reducir su resistencia.

Rara vez es necesario tomar medicamentos por vía oral, excepto en los casos más complicados.

Los contactos sexuales pueden irritar o inflamar el área afectada y deben evitarse hasta que se curen, especialmente en casos de infección (especialmente, por supuesto, en el caso de enfermedades de transmisión sexual); A veces puede ser necesario también someter a la pareja a un tratamiento para evitar el efecto ping-pong.

prevención

  1. Verifique después de orinar que el glande y la punta del pene estén perfectamente secos.
  2. Aquellos que no están circuncidados deben prestar especial atención a la higiene íntima, por ejemplo, recordar retraer completamente el prepucio todos los días y siempre secarlos completamente.
  3. La circuncisión puede ser útil para prevenir infecciones recurrentes, especialmente en hombres no circuncidados que tienen un prepucio estrecho y difícil de retraer.
How To Clean Your Hands After Touching Feces

Once the stench of fecal matter has found it’s way within our fingers, it can be an extremely difficult scent to eliminate.

Though it may seem like your hands will never return to normal, there are a range of effective household solutions for deodorizing your palms. By using the following tips and tricks you can be sure that your hands will be poo-free and smelling fresh

how to clean your hands after touching feces

Baking Soda Paste

This household powder has been used for generations as a deodorizer of difficult odors. If imply washing hands with soap has not delivered desirable results, you can proceed to create a baking soda paste that can help to absorb the residual poop aroma. Mix a solution of one part baking soda with two parts water within a small bowl and proceed to apply to the affected areas of your hands. Once you have rubbed this deodorizing compound through hands for 60-90 seconds, the baking soda residues can be washed away to leave hands smelling fresh.

White Vinegar Splash

As a common cooking and cleaning acid found within the kitchen, this substance can work wonders in cutting through difficult poop related odors within your hands. Begin by splashing hands with this solution and proceed to rub the white vinegar within the affected areas of the palms and fingers for 60-90 seconds. You may need to do this process 2-3 times if any odors remains within hands after the first application.

Neutralize with Rubbing Alcohol

In a similar application as white vinegar, the high alcohol levels within this compound can work to neutralize fecal odors on contact. After first washing hands, proceed to splash palms with rubbing alcohol and proceed to rub the solution within the hands until the alcohol has completely evaporated. If odors remain, try a second or rubbing alcohol splash until your hands are completely freshened.

Lemon Juice Squeeze

The citric acid within the lemon juice can work to slice through the difficult poop stench within your hands. Once you have soap washed hands, proceed to squeeze a teaspoon of lemon juice within one palm,and proceed to rub the juice through hands. If lemons are not available, an orange or a lime can yield similar deodorizing results.

Vodka

When rubbing alcohol is not available, the use of vodka can provide similar results. As always, make sure that hands have been washed with soap before using this method. Begin by pouring 1-2 teaspoons of vodka within one palm, and proceed to rub it within hands until the alcohol has completely evaporated away.

Old Fashion Detergent

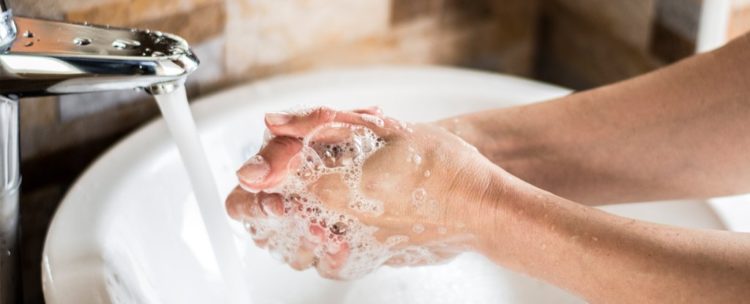
If you haven’t already done so, you should try washing hands with dish detergent soap. This type of soap has some deodorizing properties and may help in breaking down residual poop particles that may be clinging to your palm or fingers. In many cases, the use of dish detergent will be all that is needed to rid yourself of poop smelling palms.

HOW TO CLEAN POOP

On Diapers and Clothes

You will need:

  • Cleaning gloves
  • Two disposable plastic bags
  • Cleaning cloths or paper towels
  • A laundry detergent containing enzymes* (Ex: Arm and Hammer Essentials, Zout, and some liquid versions of Tide)
  • Chlorine bleach or white vinegar

* Enzymes are proteins that dissolve the bonds between the poop and fabric. In addition to cleaning, they’ll help remove the stain, too.

Directions:

Step 1: Get it Off

Heat will set the stain, so at this point, you need to work with cold water only. So, put your gloves on, put the item in the plastic bag, and carry it to the bathroom. Dump as much of the crud into the toilet as you can, flushing as needed.

  • If the item is small enough (a diaper or pair of underwear, for instance) you can keep a grip on it while flushing the toilet several times to wash away as much of the crud as possible.
  • Rinse larger items in a bathtub, if necessary.

Step 2: Apply Enzyme Cleaner

(You can do this in the toilet or tub.) Add the enzyme-containing detergent.

  • Add roughly 2 tablespoons to the toilet bowl or 1/2 cup to a tub containing a couple of inches of cold water.
  • Let the item soak for 30 minutes. Drain/flush, squeeze out excess water and transfer the article to another plastic bag.

Be sure to disinfect the toilet or tub afterward!

Step 3: Launder and Dry

Now that you’ve treated the stain, it’s time to disinfect it.

  • Wash the item in HOT water with a HOT rinse using either 3/4 cup chlorine bleach or 2 cups white vinegar (not both — that’s dangerous!) and your regular laundry detergent.
  • If you don’t have a washing machine, you can hand wash the item in the freshly-rinsed tub or a bucket using 1/4 cup chlorine bleach or 1/2 cup white vinegar and 1-gallon HOT water.

Use a hot dryer or line-dry the item. Both methods will further help disinfect the fabric.

Cleaning Poop On Upholstery and Carpet

You will need:

  • Cleaning gloves
  • A disposable plastic bag
  • Something to scrape with (a paper plate you can toss works nicely)
  • Cleaning cloths or paper towels
  • A laundry detergent containing enzymes
  • A bowl
  • Liquid dish soap
  • Isopropyl (rubbing) alcohol (known as surgical spirits in the UK)

1. Get it off: Put your gloves on and grab a plastic bag. Use a paper plate to scoop up as much poop as possible and dump it in the bag. Wipe away the rest with a paper towel and toss it in the bag, too. Get a few paper towels damp with cold water and wipe, not rub, to remove more crud.

2. Wash in place: In a bowl, combine 1 quart of cold water with 2 tablespoons of a laundry detergent containing enzymes. (Ex. Arm and Hammer, Zout, or certain liquid versions of Tide.) Get a cloth wet and dab at the stain until the area is clean. Let dry.

3. Disinfect in place: Dab the spot with isopropyl alcohol to remove any lingering stain and disinfect the area. (This is safe on fabrics as well as microsuede and microfiber furniture. If in doubt, spot test first!)

4. Carpeting only: Once the area is dry, vacuum it thoroughly to restore the carpet’s nap. For stubborn stains, try my trick here and then shampoo the carpet.

Cleaning Poop on Hard Surfaces

You will need:

Cleaning gloves
A disposable plastic bag
Something to scrape with (a paper plate works well)
Cleaning cloths or paper towels
Disinfecting spray or wipes

Did you know? Disinfecting wipes are handy, but they don’t sanitize unless you use them correctly! To disinfect a surface using a wipe, it must remain visibly wet for FOUR minutes.

1. Dry wipe first: Put gloves on and, using dry paper towels, scoop up as much poop from the surface as you can. Toss the soiled materials into the plastic bag but don’t close it yet.

2. Wet wipe second: Get more paper towels soaked with HOT water and wipe up the remaining mess. Add them to the plastic bag and throw the whole thing out.

3. Disinfect then let dry: Wet the area liberally with a disinfectant. Allow it to sit for 5 minutes, or according to manufacturer’s directions. (It takes a lot longer to disinfect than to clean.) Wipe again with clean water and allow the area to dry.

And there you have it, the full poop on how to clean poop. Remember, to avoid cross-contaminating other places in your home, you should probably shower and change clothes as soon as you’re done.

How to Clean Your House After Lice

You’ve treated the children and they’re now head lice free. Now, how do you make sure your home is too? The good news is that lice can’t live away from a human host for longer than 24 hours. So if any lice or nits (eggs) have fallen or been brushed from your children’s hair, they are probably dying anyway. However, there are a few things you can do to ensure they don’t have the chance to start another infestation.

How to clean your house after lice – Here’s What to do

So if you don’t need to get professional cleaning and clear out of your house for two weeks, what do you need to do?

First

gather up all of the clothing and bed linens that were in contact with the infested person during the 2 days PRIOR to treatment for the head lice. Here is the CDC procedure, “Machine wash and dry clothing, bed linens, and other items that the infested person wore or used during the 2 days before treatment using the hot water (130°F) laundry cycle and the high heat drying cycle. Clothing and items that are not washable can be dry–cleaned,” OR “store in a plastic bag for two weeks.”

The washing with high heat will take care of the lice. The two week time frame only comes in for items that can’t go through the high heat wash and dry procedure. Two weeks in a plastic bag will ensure that the lice have died off.

Second

deal with the combs, brushes, etc. that were used or could have been used. Cleaning these implements is easy so be safe rather than sorry and clean them all. The CDC recommends that you, “Soak combs and brushes in hot water (at least 130°F) for 5–10 minutes.”

Use a big pot on the stove and a kitchen thermometer to make sure you have a high enough temperature. Set a timer, plop your brushes and combs in the hot water, and let the time and heat do the work for you.

Third

vacuum the floors where the person with lice has been. Using a vacuum on the floors will gather up the lice and eggs. Lice die quickly when they can’t feed and the eggs need the heat from the human body to hatch. Here is what the CDC says, “… the risk of getting infested by a louse that has fallen onto a rug or carpet or furniture is very low. Head lice survive less than 1–2 days if they fall off a person and cannot feed; nits cannot hatch and usually die within a week if they are not kept at the same temperature as that found close to the human scalp.”

Cleaning your home

Cleaning your home

Lice live in hair, not the home.

Head lice aren’t a sign of an unclean environment, and are almost always transferred from one child to another via direct head to head contact. (Lice don’t discriminate between clean or unclean hair either.) The chance of your children picking up lice or nits from objects around the home is slim, therefore you don’t have to wash everything after an infestation. However if several children in the home have had lice, or there have been multiple outbreaks, it’s a good idea to take some basic precautions.

If it’s been in contact with your child’s head in the last 24 hours, wash it.

This includes pillows, sheets, towels and pyjamas. Hair brushes and combs should also be soaked in very hot water, to kill any lice or nits. Hair ties and hats can also be washed, or sealed in plastic bags for several days to ensure any nits or lice have died before re-use. To speed up the process, place sealed bags in the freezer for a couple of hours. Plush or stuffed toys that can’t be washed can be placed in a dryer on high heat for 30 minutes or sealed in bags for a couple of days.

Vacuum couches and car seats.

Any places where your child rests his or her head should be given a quick vacuum to pick up stray lice or eggs. If you have a section of carpet or a rug where your children frequently sit or lie, you might want to give that a quick clean too.

What about your pets?

There’s no need to worry about Ginger or Rex reinfesting your children. Your pets can’t carry or transmit human head lice.

Avoid pesticide sprays.

After a nasty infestation, you may be tempted to have your home fumigated with an anti-lice pesticide. However, the harsh chemicals they contain can do more harm than good, especially if someone in your family has a respiratory condition.

If your child has head lice again?

Focus treatment on the hair, not the home. Licener Head Lice Treatment kills lice and eggs with just one treatment in just 10 minutes, with no combing required to be effective.

Breath a sigh of relief

Lice are not invincible! You can follow an inexpensive and straight forward procedure to deal with cleaning your home.

Cleaning

A common misconception about treating people and homes that have had contact with lice is that the only way to get them out of the house is to put everything in the home that is made of any type of fabric in plastic bags for two weeks and have the furniture and carpets cleaned. Not necessary!
Here is what the Centers for Disease Control and Prevention (CDC) says about home cleaning when lice are found: “Head lice do not survive long if they fall off a person and cannot feed. You don’t need to spend a lot of time or money on housecleaning activities.”Here is the CDC’s recommended procedure: “Machine wash and dry clothing, bed linens, and other items that the infested person wore or used during the 2 days before treatment using the hot water (130°F) laundry cycle and the high heat drying cycle. Clothing and items that are not washable can be dry–cleaned,” OR “store in a plastic bag for two weeks.”

Also, “Soak combs and brushes in hot water (at least 130°F) for 5–10 minutes.”

The CDC recommends vacuuming the floor where the person with lice has been, “However, the risk of getting infested by a louse that has fallen onto a rug or carpet or furniture is very low. Head lice survive less than 1–2 days if they fall off a person and cannot feed; nits cannot hatch and usually die within a week if they are not kept at the same temperature as that found close to the human scalp.”
Now you know. “Spending much time and money on housecleaning activities is not necessary to avoid reinfestation by lice or nits that may have fallen off the head or crawled onto furniture or clothing.” Phew!

How To Clean Your Kendra Scott Necklace

I just can’t resist the beautiful, colorful, elegant look of Kendra Scott Necklace jewelry. If you’ve added any of her pieces to your jewelry collection, then you may notice they need a little polishing up from time to time. The official care instructions direct you to keep your Kendra in the lovely little blue bag it came in and to keep them away from other jewelry.

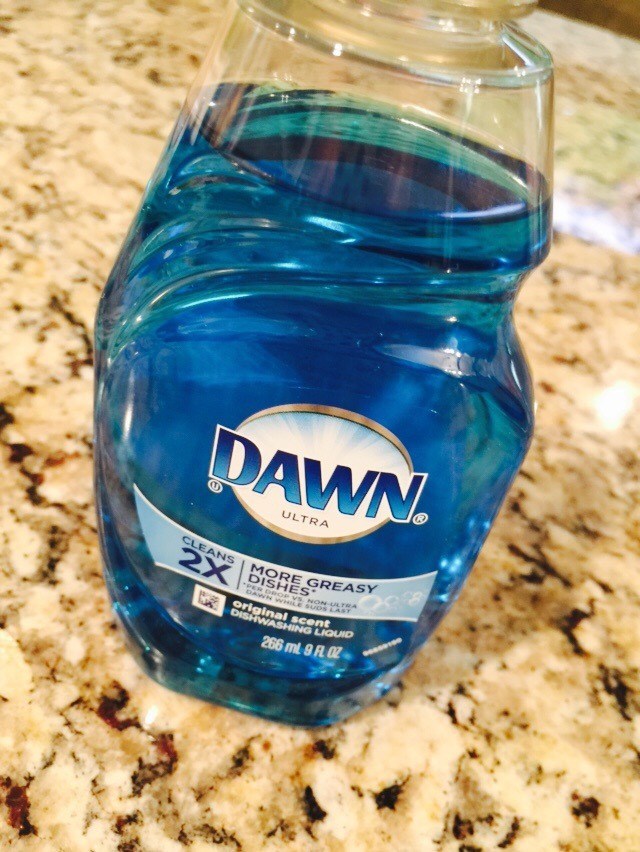
Something I learned during a former life at a David Yurman retailer was that Dawn dish soap does wonders for your jewelry. It’s mild, safe, and is made for cutting grease and grime.

cleaning kendra scott
SUPPLIES: Dawn dish soap, small bowl, water, old toothbrush, towel, jewelry polishing towel.

Get all your tools together and grab a safe spot near a sink.

DO NOT CLEAN YOUR JEWELRY OVER A SINK!

I’ve heard too many horror stories about people cleaning jewelry over a sink, dropping it, and losing it down the drain. Don’t even go there. Layout a towel and clean your jewelry over the towel.

How To Clean Your Kendra Scott Necklace

STEP 1:

Start your Kendra cleaning by mixing warm water and a 1/4 teaspoon of Dawn in a small bowl. Using an old soft toothbrush, dip the brush into the cleaning solution and gently scrub your Kendra. Focus on any areas you see build up, tarnish or maybe hairspray. Once your Kendra is nice and soapy, carefully rinse the item under warm water to remove the soap. Pat dry on a clean, soft towel. You should already see a little sparkle returning.

cleaning kendra scott
STEP 2:

Use your jewelry polishing cloth to gently rub around the outside (mount) of the earring. This will clean and polish the metal so that the true shine starts to return. Work your way around the whole earring, and finish with the ear piece.

Did you know your Kendra Scott retailer carries extra war hooks and rubber backings. If you need new ones, just ask for them.

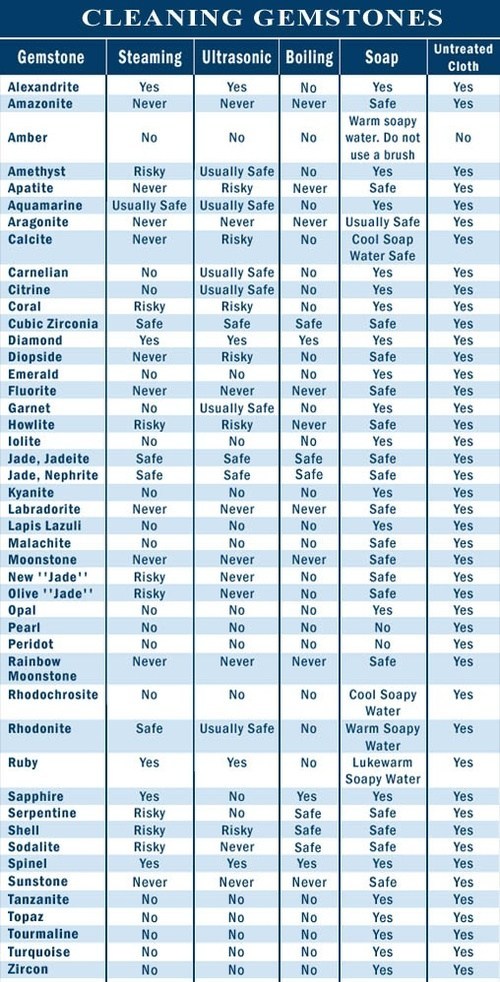
Got more questions? This chart is an excellent reference:

kendra scott

How To Clean Ears At Home Naturally?

How To Clean Ears At Home Naturally?. Ears are organs that we sometimes ignore when it comes to hygiene. However, it is important to sometimes thoroughly clean your ears.

Earwax can cause blockages in various ways that can cause discomfort, such as strange noises , and thus affect your optimal hearing. And that is why you have to clean your ears  to remove the excess earwax that has accumulated.

However, when your ears are completely healthy, they will clean themselves naturally .

The following symptoms indicate that ear wax has accumulated in your ears:

  • Pain or impaired hearing
  • Squeaking noise or abnormal sounds in your ear
  • Itching and smelly excretion

7 natural remedies to clean ears at home naturally

The most worrying thing is that not everyone knows how to remove earwax and that the wrong tools are often used to do this. As a result, serious infections and other problems are developed that affect the health of the ears.

That is why it is good to know some alternative remedies to remove earwax without complications. Below we provide seven natural remedies that can make this task easier.

1. Mustard oil to remove ear wax

How To Clean Ears At Home Naturally?

Mustard oil is a natural product that helps remove excess ear wax. Its antimicrobial properties form a barrier against germs and they also reduce the risk of infection.

How should you use it?

  • Heat a few drops of oil in a bain-marie and drop it in your ear when it is warm.
  • Leave this on for a few minutes and then turn your head in all directions to remove all clutter.
  • Repeat this process on both sides and finally wipe the outside of your ear with a cotton pad.

2. Apple cider vinegar

Rinsing your ears with a little apple cider vinegar also reduces the amount of ear wax and restores the natural pH value in the ear.

Applying this product will reduce the presence of microorganisms, limit inflammation and also help prevent the development of infections.

Ingredients

  • 1 tablespoon apple vinegar (10 ml)
  • ½ cup of water (125 ml)

How should you use it

  • Dilute a tablespoon of apple cider vinegar in half a cup of water and then pour this mixture into a pipette to be able to apply the product.
  • Drop 5 drops into each ear and let them sit there for several minutes.
  • Then repeat this at least once a week.

3. Paraffin oil

Paraffin oil

This oil will reduce the production of earwax and also soften the accumulated earwax.

How should you use it?

  • Heat the paraffin oil a little and then put three to four drops in the ear with a pipette.
  • Tilt your head for a few minutes before draining the oil.

4. Almond oil

Almond oil has many useful uses, including cleaning your ears.

How do you use it?

  • Put a little almond oil in a pipette, put three or four drops in your affected ear and then keep your head in a horizontal position for 10 minutes.
  • After these ten minutes, drain the moisture from your ear and wipe the outside of your ear with a soft cloth.

5. Baking soda

Baking soda

The unique properties of baking soda can help you clean your ears, soften earwax and protect you against microorganisms.

Ingredients

  • 1 tablespoon of baking soda (5 grams)
  • ½ cup of water (125 ml)

How should you use it?

  • Add a tablespoon of baking soda to half a cup of warm water, shake well and put a few drops in your ear.
  • Leave it there for a few minutes and remove the excess with a dry, soft cloth.

6. Garlic

The antibiotic properties of garlic  simplify the cleaning of your ear canal and inhibit the growth of bacteria and fungi.

How do you use it?

  • Cut a few cloves of garlic into pieces and then heat them in a frying pan with a little olive oil.
  • Wait until it has cooled, remove the garlic pieces from the oil and apply the oil to your ear with a cotton pad.
  • Leave on for a few minutes and then rinse your ear with warm water.
  • Clean your ear with a soft cloth and repeat the procedure with the other ear.

7. Coconut oil

Coconut oil

In addition to the antibacterial properties, the fatty acids in coconut oil ensure that this is one of the best alternatives for cleaning and protecting your ears.

How do you use it?

  • Heat a few drops of coconut oil and drop it into your ear using a pipette.
  • Wait about five minutes, drain the excess oil and wipe the outside of your ear with a soft cloth.
  • Repeat this every month.

As you have seen, there are various options for removing excess earwax without damaging the ear canal. Not sure whether you should get started yourself? Then make an appointment with an ENT doctor . Often he or she will work the ear wax outward with the help of an ear funnel and a pair of tongs, hook, lisje or piston.

Do not use cotton buds and other aids that can damage your hearing in the worst case. 

Home remedies to clean your ears

Home remedies to clean your ears

Fortunately, there are many natural, home-made methods to effectively remove excess ear wax that clogs your ears. The most common home remedies are :

Massage to loosen earwax

By massaging you can loosen the earwax that blocks your ear canal. Massage the area behind your ear and pull your ear in different directions, always opening and closing your mouth.

Hydrogen peroxide

Hydrogen peroxide , or oxygen water,  can be used to treat ear pain as well as to remove excess ear wax that has accumulated and blocks your ear canal . Below we explain how this can be applied:

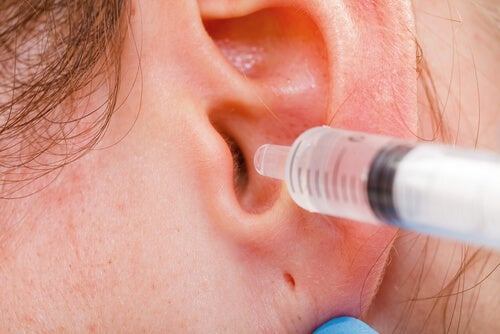
Mix half a cup of hydrogen peroxide with half a cup of warm water and fill a syringe with this solution. Lay on your side and fill your ear with it. Leave it on for three to five minutes. Then drain the liquid and then clean your ears by repeating this process, but only with warm water.

Instead of oxygen water you can also choose to use baby oil or mineral water .

Olive oil

This remedy is identical to the previous one, but you use warm olive oil . Leave on for 15 minutes and repeat the process three times a day for three to four days.

Bottle of warm water

This is an easy but very effective home remedy. All you have to do is take a bottle and fill it with warm water . Place the bottle of warm water directly on the affected ear for 15 to 30 minutes. This will soften the earwax and make it easier to clean.

Rinse out

In the store you can easily find tubes to wash out your ears . Do this with water at body temperature. Make sure you thoroughly dry each ear after treatment.

Clean your ear with a camomile infusion

For this treatment you mix two tablespoons of chamomile flowers in a cup of water. Make it an infusion and keep it warm. Make sure you sieve the infusion well so that no residues of the flowers remain.

Before using the infusion, first drop three drops of olive oil into your ears. Leave this on for five minutes. Then clean your ear with the infusion that you have just prepared.

If the problems persist, consult your doctor. He or she can clean your ears in a more thorough way.

Precautions for cleaning your ears

Precautions for cleaning your ears
  • If you feel something strange or disturbing in your ears, never clean them by inserting a foreign object . Cotton buds are not recommended. They could make the problem worse by pushing the earwax deeper into your ear.
  • If you have a perforated eardrum, never clean your ears with these home remedies!  This could cause serious damage to your ear .
  • Never clean your ears with pressurized liquid. You could damage or perforate your eardrum. Also remember that you don’t have to clean your ears too often, because that can cause infections.
  • Do not use any of the above remedies in children under 12 years old. This can cause serious problems because their ears are much more delicate. If you suspect that a blockage is occurring, consult a specialist.

Remember…

You must know well that earwax is necessary. After all, it protects your ear against dust, microorganisms and other foreign substances that could penetrate your ear canal to damage it.

That is why washing your ears is only recommended when it is really necessary (if there really was a blockage due to an accumulation of earwax).

If you get very frequent clogging, consult an ear specialist . He or she will be able to determine which treatment is best to solve your problem.